eLearning at the CTL
Upcoming Events
All | Faculty | Grad Students
Contact
Centre for Teaching and Learning
Weldon Library (WL), Room 200
(519) 661-2111 x80346
ctl@uwo.ca
Using the Accessibility Checker
Accessibility Checker
The Accessibility Checker allows you to ensure the content that you're building in your course is accessible to all students, including those using assistive technology. Follow these steps to use the Accessibility Checker in Brightspace:
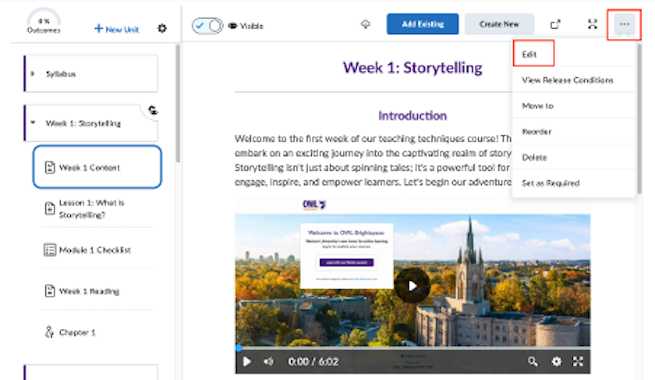
1. You can access the Accessibility Checker through the HTML editor in the pages in your course (i.e., in announcements, assignment information pages including quizzes, assignments, and discussions). On any page, click the Options icon (3 dots at the top left corner of the screen). In the drop-down menu, choose Edit.
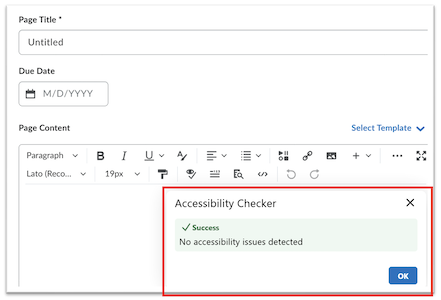
The Accessibility Checker is the icon that looks like an eye with a check mark underneath it.

2. If you select the accessibility checker, a pop up appears. In this example, the Accessibility Checker indicates that no accessibility issues were detected.
If there were any issues, errors would be listed giving you an option to navigate through them using up and down arrows. Conveniently, Brightspace will help you fix the error(s) it finds. Simply select the error and then choose Repair.
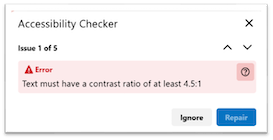
3. For example, the accessibility checker pop-up in the image above indicates that the text must have a contrast ratio of at least 4.5 to 1. In short, some text on the page is not accessible.
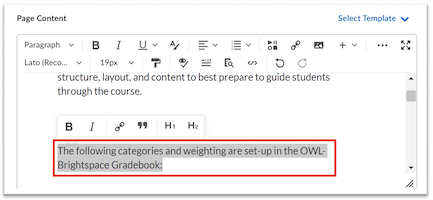
4. To correct this error, leave the Accessibility Checker (Select X at the top right corner of the pop-up), find the problematic text, and fix it by choosing a higher contrast colour for the text.
5. Once you resolved all accessibility errors, save your page.